Lallis and Higgins Blog


Recent Posts


Archive

Protecting Your Home from Bed Bugs

- Wednesday, June 28, 2023
Lallis & Higgins Insurance

Bed bugs are great hitchhikers. They can move from an infested site to a new home by traveling on furniture, bedding, luggage, boxes and clothing.

Although they typically feed on blood every 5 to 10 days, bed bugs can be quite resilient; they are capable of surviving several months to a year without feeding.

A few simple precautions can help prevent bed bug infestation in your home:

Inspect the luggage rack in your hotel room for bed bugs.

  • Check secondhand furniture, beds and couches for any signs of bed bug infestation before bringing them home.
  • Use a protective cover that encases mattresses and box springs to eliminate many hiding spots. The light color of the encasement makes bed bugs easier to see. Be sure to purchase a high quality encasement that will resist tearing and check the encasement regularly for holes or a cover that has been pre-treated with pesticide to control bed bugs.
  • Reduce clutter in your home to reduce hiding places for bed bugs.
  • Vacuum frequently to remove any successful hitchhikers.
  • Be vigilant when using shared laundry facilities. Transport items to be washed in plastic bags (if you have an active infestation, use a new bag for the journey home). Remove from dryer directly into bag and fold at home. (A dryer on high heat can kill bed bugs.)
  • If you live in a multi-family home, try to isolate your unit by:
    • Installing door sweeps on the bottom of doors to discourage movement into hallways.
    • Sealing cracks and crevices around baseboards, light sockets, etc., to discourage movement through wall voids.
  • Consider purchasing a portable heating chamber to treat any items that you believe may have bed bugs.
    • Be sure to read and carefully follow the directions if you use one of these units and be aware that they are not regulated by EPA or other federal agencies.

Source: epa.gov

Tips for Safe Trailer Towing

- Thursday, June 22, 2023
Lallis & Higgins Insurance

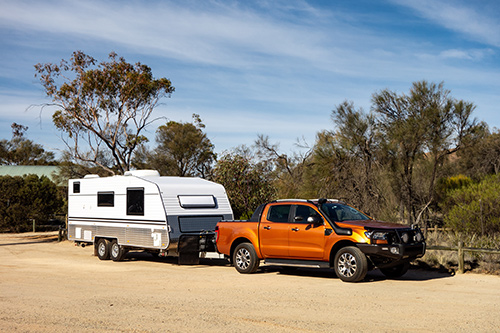
Whether it’s a boat, a house trailer or your trash to the dump, safely towing a trailer requires attention to...

Safety tips for towing a trailer

Here are nine key points for safe trailer towing and long vehicle life

1) Know your weight limits

Make sure your trailer and whatever you’re hauling fall within the towing or hauling capacities of your vehicle. Check the owner’s manual to find the trailer types that your vehicle can haul and the maximum weight it can pull. Use the right trailer hitch and make sure it is hitched correctly.

2) Distribute weight evenly

If your trailer fishtails, back off the gas and see if it stops. If it continues when you accelerate again, check to see how the weight is distributed on the trailer. It may not be distributed evenly from side to side, or else it’s too far back to place sufficient load on the hitch ball.

Pro Tip: Try to carry 5-10% of the trailer load on the hitch. Redistribute the load as necessary before continuing.

3) Ensure the trailer lights work

Connect the brake and signal lights. Double check to make sure the trailer’s brakes, turn signals and tail lights are synchronized with the tow vehicle.

4) Properly inflate the tires

In addition to staying within weight limits for your rig, be sure the tires are in good condition and properly inflated. Be sure to check your wheel bearings, too. An overheated bearing will sideline your rig as fast as a flat tire. Check out this video on bearing maintenance.

5) Know that your vehicle will handle differently

When towing, you’re operating a vehicle combination that’s longer and heavier than normal. Be sure to adjust your driving practices accordingly.

Backing up is tricky, but it’s a skill you can learn. Until you’re experienced, have someone direct you from outside in those tight spots or places where you have limited visibility.

Avoid sudden turns.

When it comes to towing accidents, don’t say, “It can’t happen to me.” Say instead, “It must not happen to me.”

6) Buckle your seat belt

In case your tow vehicle ends up upside down.

7) Trailer towing requires increased stopping distance

It’s a simple matter of physics. When towing, you have more momentum than you would without a trailer. Remember that stopping requires more time and distance. Avoid tailgating and pay attention to what’s happening a little farther down the road than you normally would.

8) Keep your head on a swivel

Maybe you forgot to fasten a chain, secure the hitch or tie down your payload properly. If you’re in a hurry to get home after a long trip, things like that can happen.

Once you’re on the road, frequently check your mirrors to make sure everything looks good back there.

9) Upgrade your transmission protection

Towing places enormous stress on a transmission. In fact, because of the intense heat, towing is probably the number-one killer of transmissions.

For this reason, the “towing package” on many trucks includes a transmission-oil cooler. It also helps to use a high-end synthetic lubricant. Synthetics reduce friction and provide better resistance to high heat, helping the tranny run cooler, shift confidently and last longer.

Source: amsoil.com


Be Aware of Hazards & Weather

- Thursday, June 15, 2023
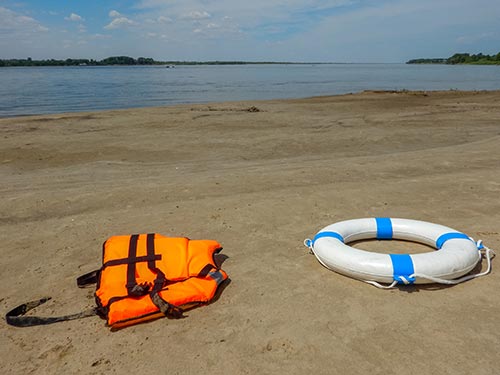
Lallis & Higgins Insurance - Life Jacket

Being water competent in the ocean requires stronger and different skills than in a pool. Whenever you are at the beach, ocean or other open water environment, watch and prepare for:

  • Changing tides.
  • Fast-moving currents and waves, even in shallow water.
  • Drop-offs that unexpectedly change water depth.
  • Unexpected changes in air or water temperature.
  • Hazards, such as underwater obstacles, rocks and debris.
  • Vegetation, marine animals and fish.
  • Other people’s activities in the same waters, such as boating.
  • Thunder & Lightning.
    • Leave the water immediately, if swimming off shore.
    • If you’re out in a boat, head back to shore as quickly as possible.
    • If you’re unable to get to shore, lie down in the bottom of the boat or shelter in the cabin if available.

Establish and Enforce Rules and Safe Behaviors

  • Enter the water feet first for your safety!
    • Always enter unknown or shallow water cautiously.
  • Only dive in water clearly marked as safe for diving, at least 9 feet deep with no underwater obstacles. Never dive head first into surf!
  • Do not enter the water from a height, such as a bridge or boat.
  • Be careful when standing to prevent being knocked over by currents or waves.
  • Swim sober.
  • Supervise others sober and without distractions, such as reading or talking on or using a cell phone.
  • Swim with a buddy even in lifeguarded areas.

Take These Water Safety Steps

  • Employ layers of protection including barriers to prevent access to water, life jackets, and close supervision of children to prevent drowning.
  • Ensure every member of your family learns to swim so they at least achieve skills of water competency: able to enter the water, get a breath, stay afloat, change position, swim a distance then get out of the water safely.
  • Know what to do in a water emergency – including how to help someone in trouble in the water safely, call for emergency help and CPR.

Source: redcross.org


DIY Car Detailing

- Monday, June 05, 2023
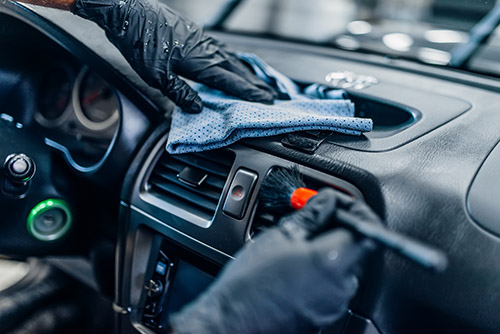
Lallis & Higgins Insurance - DIY Car Detailing

Ever wonder why your car never looks quite as good as some others after a car wash? It’s all in the details. DIY car detailing starts with a car wash but doesn’t stop there. Its purpose is to get your car looking showroom-new on the inside and out — or as close to it as possible.

1. GET YOUR CAR READY

Before you start, roll down all the windows, remove all loose stuff (change, trash, phone cables, mounts, etc.), remove the floor mats and empty the trunk.

2. VACUUM THE INSIDE

Tire detailing (courtesy Jeff Swain)

Put the soft brush attachment on your vacuum cleaner, and go over the upper and lower parts of the dashboard, the center console and the fabric or leather parts of the doors. Next, vacuum your seats from the headrests down. Use the wand attachment to clean in between and under the seats. Don’t forget to vacuum out cup holders, change trays, door pockets and the glove compartment. Do the trunk next, and save the carpets and floor mats for last.

3. CLEAN YOUR UPHOLSTERY AND CARPETS

Now that all the loose dirt, leaves and random bits and pieces have been vacuumed up, look at what’s left behind. You’ll probably need to do some upholstery and carpet cleaning. Use a fabric cleaner or a leather-specific cleaner to avoid damaging your seats and mats.

4. CLEAN ANY HARD SURFACES

Use an all-purpose cleaner to wash any hard plastic surfaces, such as the dash, the cup holders and the seat belts. Be careful around any electronics — use more precise tools like cotton swabs to avoid damage.

5. ELIMINATE LINGERING ODORS

If you have leftover odors from mildew, food, sweat or anything else, don’t cover it up with a hanging air freshener. Find the source, and use an odor eliminator. This could be as simple as using a spray or even leaving an open box of baking soda in the car (while parked). For tough odors, some pro detailers use industrial-strength ozone generators.

6. WASH THE BODY OF YOUR CAR

Find a shady spot and get the car wet before you get it soapy using the two-bucket method: Use one bucket for clean, soapy water and one for rinsing, dipping a microfiber cloth in the first bucket and cleaning it in the second bucket. Wash your car a section at a time, starting at the top and working downward, so dirty water doesn’t run over an area you just cleaned. Use a soft chamois cloth to dry the car.

7. CLEAN ANY GLASS AND TIRES

After you’ve cleaned every crack and crevice of your car’s body, move on to washing the windows, windshields and mirrors with a glass cleaner. Finally, scrub the tires and possibly apply some tire blacking as well.

8. POLISH AND WAX YOUR CAR

Before you apply wax, see if the finish looks dull after you’ve washed and dried it. This could be oxidization, especially if it’s an older car with a paint job from before the advent of clear coat. This is where a polisher pad would come in. Once you’ve got that perfect shine, protect it with a good wax.

Make DIY car detailing part of your seasonal routine to keep your car looking great between washes. You’ll appreciate the time it took when you see your everyday vehicle looking like it just rolled off the lot.

Source: napaonline.com


Get an insurance quote &
see how much you can save.