1. Aerate the soil
“Aerating” simply means making holes in the ground by removing plugs of soil. And it’s the single most important task you can perform to maintain a healthy, good-looking lawn. Nothing else comes close! It relieves compaction caused by foot traffic and creates extra pore space in the soil, allowing air, nutrients, and water to enter. All of that helps roots to thrive. Aerate your lawn at least once a year, preferably in the fall. Do it two or even three times each year if you can. The more, the better. You can rent a lawn aerator at any equipment rental store. Get one that will remove plugs of soil rather than one that pokes holes in the ground.
2. Gutter cleaner
An old plastic spatula makes a great tool for cleaning debris from gutters! It doesn’t scratch up the gutter, and you can cut it to fit gutter contours with snips. Grime wipes right off the spatula too, making cleanup a breeze. Don’t feel like putting in that much elbow grease? Consider a gutter cleaning robot!
3. Clean weep holes
Weep holes may be the tiniest feature of many sliding windows and vinyl replacement windows, but they serve a big function. The little holes, located on the exterior bottom of the frame, are an outlet for rainwater to drain away from the home, but they often can become clogged up with debris. To make sure they’re working properly, spray the outside of the window with a garden hose—a steady stream of clean water should exit from the holes. If it doesn’t, use a wire hanger or compressed air to force the blockage out. Re-test with fresh water to ensure they’re completely cleaned. While you’re at it, do these 10 more vital home maintenance tasks you’ll regret if you forget.
4. Reseed late in the growing season
Reseed in the late summer/early fall. Whether you’re seeding a small patch or a whole yard, you’re going to be much more successful if you wait for the cooler, damper weather of late summer or early fall. It’s almost impossible to get seed to survive during the dog days of summer. It’s simply too hot and dry. You’ll most likely just waste your time and expensive seed.
5. Get your gutters ready
Make sure your home is ready to deal with the rain and snow that comes as the seasons change. Walk around your home and check for loose gutters, broken pieces, and detached downspouts and make the necessary repairs. Ensure your gutters are clear of leaves and other debris and that your downspouts are directing water away from your foundation.
6. Check exterior caulking and weatherstripping
Fall is the perfect time to make sure your house is properly caulked and your weatherstripping is in good shape. Inspect around windows, doors, and anywhere else two materials meet to make sure the caulk is in good shape. Check the weatherstripping around doors and replace if it’s broken or missing—it’s super easy to do. Here are 40 more home repairs anyone can do.
7. Give your roof a once-over
No one wants to be fixing a roof in the dead of winter. Give it a once-over to make sure there aren’t any signs of trouble. Pay attention to broken or missing shingles, missing flashing and any discoloration.
8. Fix driveway and sidewalks before they get worse
Changing temperatures and moisture can turn a small concrete problem into a big one. Take some time to repair broken concrete and get some more time out of your sidewalk, driveway, and steps before they’re in need of full replacement.
9. Install frost-proof outdoor faucets
New outdoor faucets are frost-proof and also prevent unsanitary water from contaminating your water system. Installing a new outdoor faucet takes just a few hours and will give you peace of mind all winter long. These other fall to-dos are a little less work and a lot more fun.
10. Winterize your gas grill
If you’re not a winter griller, now’s the time to pack away your grill before it’s covered with a foot of snow. In addition to giving your grill a thorough cleaning to remove grease and food scraps, take these steps to help prevent any unpleasant surprises when you fire up your grill again next spring.
Shut off the gas at the LP tank, unfasten the burner, slip the gas tubes off the gas lines, and lift out the unit. Coat the burners and other metal parts with cooking oil to repel moisture that can build up over the winter and to prevent rust. Then wrap the burner unit in a plastic bag to keep spiders and insects from nesting in the gas tubes during the winter. This is a common problem that can make for balky starts, uneven flames or even a one-alarm fire the next time you light your grill.
If you’re storing your grill outside during the winter, just keep the propane tank connected (but shut off) and put a protective cover over the entire grill when you’re done cleaning it. If you’re storing the grill indoors, don’t bring the tank inside, even into the garage or a storage shed. A small gas leak can cause a huge explosion if the tank is stored in an enclosed space. Instead, disconnect the tank and store it outside in an upright position away from dryer and furnace vents and children’s play areas. Tape a plastic bag over the grill’s gas line opening to prevent insects from nesting.
11. Winterize your sprinkler system
ou don’t have to pay someone to blow out your sprinkler system. You can do it with your own compressor, but be aware that even the largest home compressor isn’t powerful enough to blow out the entire system at once.
If you like number crunching and you have the original irrigation layout showing the gallons per minute (gpm) of each sprinkler head, divide the gpm of each zone by 7.5. That’ll give you the cubic feet per minute (cfm) you need to blow it out. Otherwise, rent a 10-cfm compressor and hose from a tool rental center.
Set the compressor air pressure regulator to a maximum of 80 psi for rigid PVC pipe systems, or 50 psi for flexible black polyethylene pipe. Then turn off the water supply and set the system timer to open just one zone. Next, open the manual drain valve at the end of that zone (if equipped). Then, connect the air line to the blow-out port, as shown. Close off both valves on the backflow preventer. Then remove the plug on the blow-out port and screw in a quick-connect hose adapter. Snap on the air hose and connect the other end to the compressor. Now blow out the line. The heads should pop up and spit out water. Disconnect the hose as soon as they run dry. Don’t overdo the blow-out—without water cooling the plastic gears, they can melt in less than a minute. Move on to the next zone and allow the heads to cool. Then go back and blow out each zone a second time.
12. Seasonal battery storage
You’ve emptied the gas, sealed the exhaust and prepared the engine for seasonal storage. But before you throw the tarp over your boat or roadster for the long winter sleep, think about how you’re going to care for the battery.
Batteries lose their charge when they sit idle, and when that happens, you could wind up with a worthless battery in the spring. To keep batteries healthy, they should be charged every six weeks. But leaving a standard battery charger connected for the whole season isn’t a good idea—that will overcharge the battery and shorten its life. Instead, invest in a ‘battery maintainer.’
Battery maintainers are designed to be left on for the entire offseason. They monitor battery voltage and automatically adjust the charge to avoid under- and over-charging.
13. Drain garden hoses or waste money on replacements
Due to circumstances (laziness), I sometimes neglect to drain garden hoses before putting them away for the winter. Usually, it’s not a problem. But every once in a while, freezing water splits a hose open. I’ve lost a few cheap hoses this way and a super-expensive one (ouch!). That’s just dumb because draining hoses is so quick and easy: Blast out the water with an air compressor or stretch them out on a sloped yard or driveway. If you need to buy a new garden hose, learn how to do a simple test, right in the store, to see if the hose will be kink-free!—Gary Wentz, Editor-in-Chief, Family Handyman
14. Drain mechanical sprinklers or buy a new one in the spring
I bought one of those sprinklers that looks like a little tractor. It’s designed to follow the path of the hose on the ground. It was expensive, but it worked perfectly for my irregular-shaped yard; that is until it spent the winter in my unheated garage. The residual water froze and destroyed the gears inside. The following spring, all it did was dribble water and make a clicking sound. I should have drained it before storing it. Just to be safe, I’ll keep the new one on a shelf in the basement. — Ken Collier
15. Change your furnace filter
Changing your furnace filter is one of the easiest things you can do to keep your furnace in good shape. If you haven’t changed it in a while, make sure you have a fresh one before you turn your furnace on for the first time. Check out the home maintenance tasks smart homeowners do every week.
16. Take a peek at your furnace
Make sure your furnace is in good shape before you really need to use it. With a few tools and some time, you can perform a DIY furnace inspection to head off problems before they start.
17. Check your chimney or risk a fire
Creosote buildup causes chimney fires. You should have your chimney professionally inspected or cleaned after every 70 fires. If you burn wet wood (which you shouldn’t), have it inspected or cleaned every 50 fires.
Don’t remember the last time you had it cleaned by a pro? A quick way to tell if your chimney needs cleaning is to run the point of your fireplace poker along the inside of your chimney liner. If you find a 1/8-in. layer (or more) of buildup, call a chimney sweep. For additional expert chimney maintenance advice, check out what two certified professional chimney sweeps have to say.
18. Stop airflow up the chimney
Fireplace chimneys can be very inefficient, letting your warm inside air disappear like smoke up a chimney. If you have airtight glass doors that seal the opening, you’re in good shape. (The doors are available at fireplace retailers and home centers.) If not, a special balloon or chimney-top damper will get the job done.
For fireplace chimneys that are seldom or never used, inflate a Chimney Balloon inside the chimney to stop the air leaks. Buy it directly from the company. Partially inflate the balloon by mouth or with a pump, then stick it into the chimney and blow it up the rest of the way.
Putting in and taking out the reusable balloon can be messy (here’s when to clean a chimney flue), so you don’t want to hassle with chimney balloons if you regularly use your fireplace. But that doesn’t mean you have to settle for energy loss. Instead, you can install a chimney-top damper system, like the Chim-a-lator, which seals the top of the flue when the chimney’s not in use. A lever in the fireplace controls the damper via a long cable.
Installation involves attaching the damper and screened-in cap to the chimney top, then mounting the lever in the fireplace. If you don’t feel comfortable working on the roof, hire a chimney sweep or mason, who can install the system for you.
19. Check your water heater
Extend the life of your water heater tank and maintain your water heater’s efficiency and safety with a few minutes of basic maintenance once a year. Here are more maintenance tasks that’ll save you time and money in the long run.
20. Winterize your lawn mower
Don’t just shut off your lawnmower and leave it until spring—that’s a bad idea. But winterizing your mower only takes an hour. Give the deck a thorough cleaning. Then, add fuel stabilizer and a few ounces of oil to make sure the engine will start right up without hesitation in the spring.
21. Store outdoor furniture
on’t leave your outdoor furniture exposed to the elements all winter long. At the very least, give your furniture a thorough cleaning and cover it or bring it inside for the season.
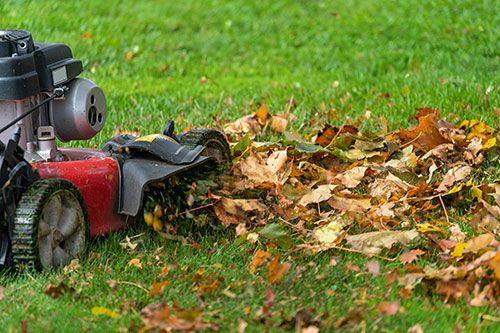
22. Take care of those leaves
Once leaves are on the ground, put aside some time to tackle that chore.
23. Deep clean rugs and carpeting
Take advantage of one of those beautiful fall afternoons to give your rugs a deep clean. Take area rugs outside and give them a good shake (or a good whack), then give them a thorough vacuum with your shop vac. Don’t forget our interior carpets—you can rent a carpet cleaner and give your carpet a deep clean before you start hosting holiday gatherings.
24. Get your snowblower ready for service
You’ll want to be sure your snowblower starts before the first big snowfall. Take some time to get your snowblower running and in good order so it’ll be spitting snow as soon as it hits the ground.
25. Get your property ready for snow
Before the snow flies, take a few minutes to inspect your property. Remove rocks, dog tie-out cable, extension cords, holiday light cords, and garden hoses. Then stake out paths that run near gardens so you don’t accidentally suck up rocks and garden edging. Mark your walk and driveway perimeters by pounding in driveway markers. If the ground is frozen, just drill a hole using a masonry bit and your battery-powered drill.
Stayed tuned next week for the next 25 Fall maintenance tasks...
Source: rd.com